Managing Assignments
For Instructors Only
Remember that you create templates inside your personal area, but these templates can be copied into any course for which you are the instructor.
To create a new assignment, click on the document icon on the template list inside of the course:

You will be presented with several options:
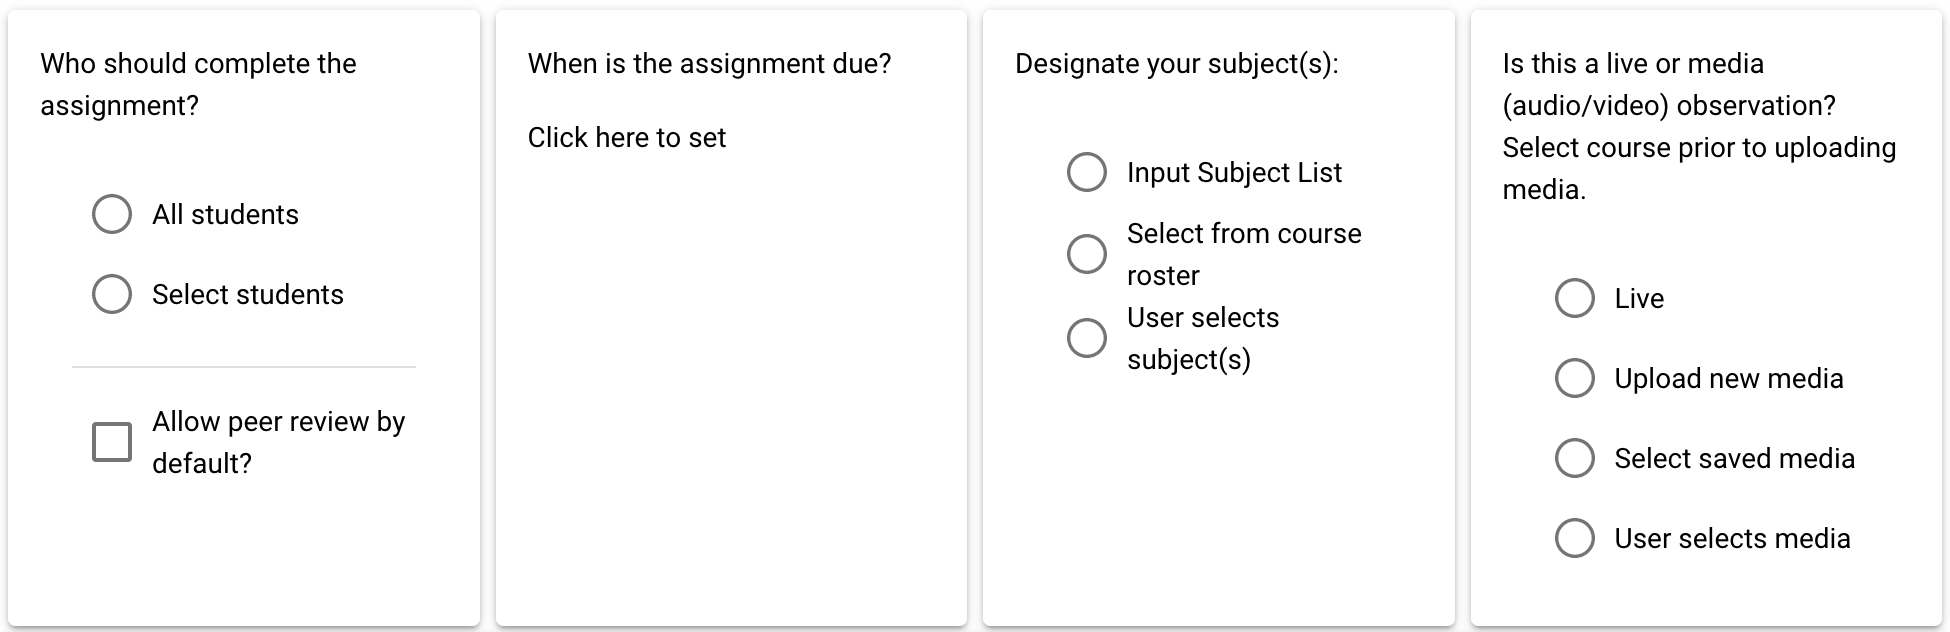
- Select which students should complete the assignment. If you want all of the students to be able to see each other's submissions after they complete their own assignment, select 'Allow peer review by default.' When you review the user's submissions, you will be able to show or hide individual submissions for peer review.
- When is the assignment due?:
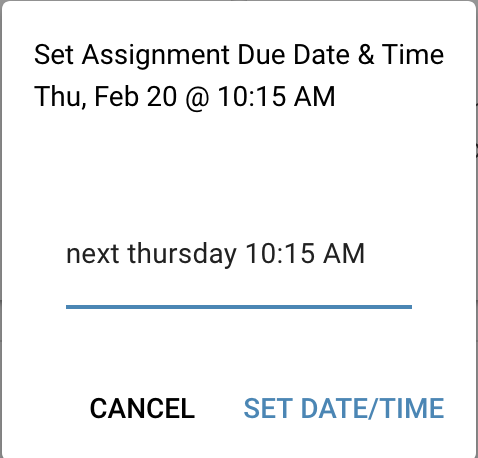
A cute little dialog pops up when you click on "Set Assignment Due Date & Time." As you can see in the image, the dialog incorporates a natural language processor so you can enter a relative date and time to yield a specific date and time. (Disclaimer: I didn't write the language parser but it's very cool. Play around with it a bit!) It defaults to AM. Also, 'thursday' means 'thursday later this week.' NEXT thursday means 'thursday in the next week.'
When you click on the "SET DATE/TIME" button, the time you chose is entered back in the main date/time option box.
Designate your subject(s)
- Input subject list: Use this to simply enter names of subjects.
- Single Target or Subject: Use this if you want to input a single name or if you want to observe a single class, for instance.
- Select from course roster: Here, you can select names from the active course you selected in the first step.
- User selects subject(s): With this option, the user completing the assignment gets to designate the subject(s).
Select Media Option:This is similar to the media options for completing a personal observation.
- Live: no media
- Upload new media file: If you have a new video that you would like for the students to use, upload it here. (See New Observation for instruction on how to prepare and upload a video.)
- Select saved media: If you have already uploaded a video for this class, then you can select it here.
- User selects media: When you select this option, then the user can select one of their videos, such as a video of themselves, to complete the assignment.
Assignment Instructions
Click on Assignment Instructions to see your options:

You can either use the rich text editor to write new instructions or upload a PDF file that the students will be able to read. (It is not advisable to cut and paste formatted text into the editor. This may cause formatting errors. You may paste plain text and then format it.)
Template List
Even though you started the new assignment from an existing template, you can edit the observation template here, too. Editing the template will not alter the original template.
Save Assignment
Once you have all of the options set, then the 'Save Assignment' button will be enabled. Click it to save the assignment. If you decide to alter the assignment at a later date, you can edit the assignment from your course assignment list from the Dashboard.
Reviewing Completed Assignments
When the students complete their assignments, you will see the number of completed submissions for each assignment in the Assignment tab. When you click on "X assignments completed," you will be taken to the review page.
At the top left, you should see an alphabetical popup list of the students who have completed the assignment. Click on the selection icon to see the popup.
Once a particular submission is open, you can view the entirety of their submission. In the top right, you will see a small 'Feedback' button.
When you click on the Feedback button, a rich text editor will pop up. Click on 'Save' when you are done writing feedback. The student will be able to read the feedback when they review their assignment. The student who completed the assignment can also do a personal review.
Peer Review
If you selected 'enable peer review by default' during the assignment setup, the students will be able to see each other's submissions once they have completed their assignment and provide feedback. ALL feedback is visible to ALL users, so you may want to monitor their reviews.
As the instructor, you can enable or disable individual submission for or from peer review, as necessary. Simply click on the checkbox next to "Peer review enabled on this submission."